Why Listen To Us? Well, because we KNOW coffee! In fact, we make our own coffee, coffee machine cleaners, and reusable capsules which we've sold to over 41 countries. Our team of experts have over 15 years of experience, so whether you're looking for a recipe or a repair guide, we've got you covered 💚
Not the right machine for you? Check out our other descaling guides for Keurig coffee machines below:
Table of Contents
What is Descaling?

How Often Do You Need to Descale Your Keurig 2.0 Machine?
In the case of the Keurig 2.0, the touch screen will report the message “Time to descale the brewer!”
You’ll also want to regularly replace the Keurig water filter unit. Skip to THIS SECTION if you want to find out how to do that
How Does The Descaling Process Take?
What You Will Need:
- Descaling Solution
- Clean Tap water
- A 300ml/10oz jug, bowl, or large ceramic mug that will fit under the spout of the machine.


A Step-By-Step Guide On How To Descale Your Keurig K200 (2.0) Coffee Machine
- Exterior clean
- Descaling Solution Rinse
- Fresh Water Rinse
Time Required: Approximately 45 minutes
Step 1: Exterior clean
Keeping the exterior of the machine clean from just, grime and greasy build-up is essential to stop dirt from getting into the machine.
Step 2: Descaling Solution Rinse
- If you’re using a Keurig water filter, remove it before proceeding. It’s a good opportunity to also replace the filter while you do your descaling run.
- Fill the water reservoir with a mix of desclaing solution and water. If you’re using the Keurig descaler, use one bottle of descaler, and then refill with one bottle of water to achieve a 1:1 ratio. If you’re using another descaler, then follow the instructions on the back.
- Plug the machine in, and ensure the machine is powered
- Ensure there is no capsule in the machine. lower the handle and DO NOT insert a capsule into the machine.
- Force the descaling liquid through by Pressing the largest beverage size button.
- Once complete, discard the contents of the collection jug/mug
- Repeat steps 5 and 6 until all the descaling fluid is consumed and the touch screen reports ‘More Water Please’
- Let the brewer stand for 30 minutes to allow the descaling fluid to take effect.
Step 3: Fresh Water Rinse
- The next step is to rinse out any remaining descaling solution from the water reservoir.
- Then, pour fresh water into the reservoir until the water level reaches the MAX FILL line.
- Return the empty collection jug/mug onto the drip tray plate
- Run a ‘Rinse Brew’ by pressing the largest brew size button again.
- Empty the contents collected in the mug into the sink.
- Repeat steps 4 and 5 at least 12 times to ensure the machine is thouroughly rinsed. During the entire process, you may have to refill the reservoir at least once
- The descaling is now complete. Reinsert the filter cartridge if you had removed it at the start of the process.
Download: Get a copy of our descaling cheatsheet below.


How To Replace The Water Filter On Your Keurig 2.0 Machine
Your Keurig coffee machine also has a small carbon water filter cartridge that has the purpose of removing impurities from the water that comes out of the water reservoir.
The Keurig 2.0 user manual recommends replacing these every 2 months, although we find it easier to do it every time we descale the machine.
What You’ll Need:
To get started, you’ll need to get a pack of replacement water filters.
We normally buy these K&J Keurig compatible filter pods from amazon which come in a 12-pack and cost less than $9.
Keurig also sells this cleaning kit which comes with 2 filter cartridges, 4 rise pods, and a bottle of descaler. This is convenient if you want to just buy one thing, but we don’t ever use the rinse pods and think you get better value by buying the filter cartridges and the descaling powder separately.
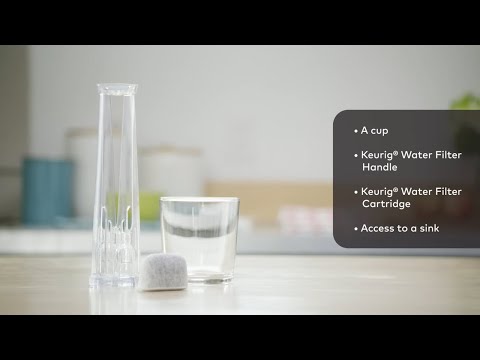
You’ll also need, a glass of water (to soak the filter cartridge)
How to replace the filter pod:
[Time Required: 6 Minutes]It’s really simple to swap out a filter cartridge.
- Take the filer out of its package and place it in a glass of water for 5 minutes to soak.
- While it’s soaking, remove the plastic filter unit from your Keurig 2.0 machine’s water reservoir. disassemble the unit and dispose of the old filter cartridge.
- Rise the mesh filter in the base of the unit to clear out any debris that’s become lodged there.
- After 5 minutes have passed, take the filter out of the water and give it a quick rinse under the faucet/tap to rinse off any filter material.
- Finally, insert the filter back into the base of the plastic filter unit, and clip the unit back together. Inset this assembly back into your keurig’s water reservoir and you’re done!
This video from Keurig’s official Youtube channel shows exactly how.
Frequently Asked Questions And Issues:
- Foam dispensation
- Brewer not filling properly
- can you use vinegar instead of descaling solution
- What is descaling solution made from?
- Can you make your own descaling solution?
- Can I use any descaler in my Keurig 2.0 machine?
- What happens if I don’t descale my coffee machine?
- Is decaling soltion toxic
- Can you descale with baking soda?
Q. Why is there foam coming out from the coffee machine?
Most descaling solutions use a concentrated food-safe acid as the active ingredient. In the case of the Eco Descaler we use, this is citric acid – so any foam or residue from the descaler is perfectly harmless in diluted quantities.
Q. Is Your Keurig not filling correctly?
To address this issue, you must switch off and unplug the brewer. Then, you have to remove the descaling solution from the reservoir and clean it thoroughly. Water must be refilled before plugging and turning the power on. The next step is to repeat the Fresh Water Rinse cycle recommended in Step 3.
Under normal circumstances, the issue will be resolved. If you experience the same problem again, you must keep the brewer unplugged for half an hour before starting the rinsing task.
Q. Can you use vinegar instead of descaling solution?
Unfortunately, however, vinegar tends to peel off the scale build up in flakes which could clog your machine causing irreparable damage. We’ve heard numerous cases of people having to throw out their coffee machine because of this. We’d recommend sticking with a commercial descaling product.
Q. What is a descaling solution made of?
Q. Can you make your own descaling solution?
Q. Can I use any descaler in my K 2.0 Machine?
Q. What happens if you don’t descale your coffee machine?
Q. Is descaling solution toxic?
Q. Can you descale with baking soda?
Final Thoughts And Recommendations:
It’s essential to descale your Keurig 2.0 Coffee Machine every 2-3 months. This will not only increase the life span of your Keurig machine, but also keep your coffees tasting great and fresh.
Descaling takes around 45 minutes and consists of a descaling run and a rinse run. You can use any brand of descaling product in your Keurig 2.0, as long as you dilute it with the correct amount of water to the manufacturer’s instructions.
We recommend using the Green Pods Eco Descaler. It comes with 4 sachets (1 year’s supply) which are perfectly portioned. It’s environmentally friendly, and it’s also more cost-effective than the name-brand Keurig Descalers.
You can get it from Amazon here.

- ✔️ ENJOY BETTER TASTING COFFEE: Infrequent descaling is the #1 reason your coffee is tasting bad. Descale and you’ll taste the difference.
- ✔️ SAFE FOR YOU AND YOUR MACHINE: Our Eco Descaler is safe for all machine parts. It leaves no harmful residues and does not cause corrosion within the coffee machine.
- ✔️ WORKS ON ALL COFFEE MACHINES: Designed and tested on all leading coffee machines including Nespresso, Keurig, Dolce Gusto, Caffitaly, Breville, Delonghi, and more.